Category Archives: Programming

Building a Saas application

This is a brainstorm post where I will jot down the ideas to build a saas application. Before we start, we have to go to basics.

What is a Saas?

Software as a service (Saas) is a software delivery model. In this model, software is served through subscription service. Saas has been popular for more than a decade now. In fact, the sales of such software has sky rocketed that building a simple software has become easier. From project management to ordering a healthy food, we can get any of these services through software with subscription.

Now what do we want to build and how do we start?

Of course, this is not an easy question to answer in a single post. Lot of times, there are lot of trial and errors you have to go through to build a viable product that people will use it. But also what and who are we targeting as an audience. There are lot of broader areas to think to build a product. That would make the entire process to build a software way too complex. So where do we start? The eternal question still remains. Human psychology over the years has progressed and helped technology to build lot of cool products. With AI has been knocking on our doors, what we build today, will be obsolete in next ten years. Based on own experience, what I have found, is that look into your own daily life. When you go for grocery shopping, when you talk to your friends, coworkers. The moment, you feel frustrated anything that is not in your control, that’s where you have something to build on.

I know it sounds ridiculously easy to write here in the post, but not easy when you are living the life. What I am trying to point is, look at problems you or other human face and if that problem can be solved through a software, you have got a viable product idea.  Every pain point, problem is an idea to build a product. Simple example – Elon Musk was driving on LA roads, he was caught in a traffic which didn’t move for long time. How do we improve our traffic? With increasing cars and population, this is almost going to be a night mare in future. He realized the problem and started a company called The Boring Company which will build underground tunnels for handling traffic.

Back to our idea storming session about building a solution for what problem. If you are like me who works in a software company, it is easy to see through this dilemma to build a solution that can help you and other developers equally. But in a larger context, you can always go through different Saas services and hear the feedback from those services’ users. Any negative feedback is your path to build a product. Assuming we got the idea to build a Saas product, so how do we proceed further?

Post-idea discussion

Once we have a solid idea, we can think about building a minimum viable product which gives customers chance to explore the product with minimum fuss. Less complex the product is for customers to use intuitively, better will be their experiences and happier they will be to recommend your product to others. So one of the major aspect you should work on after a solid idea, is to create a minimum viable design. This will be alpha version of the product. Getting alpha version out of the door in minimum time will give you better idea where to focus on scaling the product in future. This will also save time and money.

Technology and Frameworks

Once we have initial design of minimum product, we can think of what technology and framework to use. What kind of infrastructure to use? Considering less expensive option, cloud is very popular to use to build a Saas product. This reduces the management of infrastructure while giving high availability and scalability. Amazon, Google and Microsoft all these companies offer cloud solution to build your application. Also if you want to scale your application in future for data intensive, cloud is the best option to handle all kinds of load.

For backend, there are different frameworks available based on C#, Python or Java. Since I have worked on Java, I vouch for Spring which offers lot of flexibility and ease to add lot of code easily. Of course, there is a learning curve if you have never used spring before. For database, we have two major options, one is SQL based database or NoSQL. If it is data intensive application, NoSQL makes more sense.

On frontend side, angularjs offers lot of ease to build a modern user interface to interact with backend.

Conclusion

There are lot of other factors we have not considered in this discussion especially related to performance and health of the application. Also we didn’t discuss any major approach to build the application. I hope this brain storming post will give readers an idea what possibilities are out there to build something that is helpful.

How to implement a chatbot in Java

So we are back on our discussion about chatbots. I will not talk about basics of chatbots that I covered here. I will directly start showing how to implement a chatbot in Java. We are going to use AIML (Artificial Intelligence Markup Language) library for this implementation. This library is opensource and provided by google.

A maven project

As a first step, let’s create a maven project in eclipse with groupId com.betterjavacode and artifactId as chatbot. Once the project is created, we can add ab.jar to project by adding the respective dependency in maven pom.xml  like below:


<project xmlns="http://maven.apache.org/POM/4.0.0&quot; xmlns:xsi="http://www.w3.org/2001/XMLSchema-instance&quot; xsi:schemaLocation="http://maven.apache.org/POM/4.0.0 http://maven.apache.org/xsd/maven-4.0.0.xsd"&gt;
<modelVersion>4.0.0</modelVersion>
<groupId>com.betterjavacode</groupId>
<artifactId>chatbot</artifactId>
<version>0.0.1-SNAPSHOT</version>
<name>JavaChatbot</name>
<dependencies>
<dependency>
<artifactId>com.google</artifactId>
<groupId>Ab</groupId>
<version>0.0.4.3</version>
<scope>system</scope>
<systemPath>${basedir}/lib/Ab.jar</systemPath>
</dependency>
</dependencies>
</project>

view raw

gistfile1.txt

hosted with ❤ by GitHub

Google library for AIML provides default AI rules to use to implement chatbot. We will add these rules in resources directory of our project. Copy bots folder from program-ab directory into resources folder.

Chatbot Program

Now we will write the chatbot program which will be part of main method. In simple terms, once we invoke this program through main method, it will be in an infinite loop. An input command will wait for user input and then based on our aiml library chatbot will answer to what an user had input.


try {
String resourcesPath = getResourcesPath();
System.out.println(resourcesPath);
MagicBooleans.trace_mode = TRACE_MODE;
Bot bot = new Bot("Mr. Chatter", resourcesPath);
Chat chatSession = new Chat(bot);
bot.brain.nodeStats();
String textLine = "";
while (true) {
System.out.println("human: ");
textLine = IOUtils.readInputTextLine();
if ((textLine == null) || (textLine.length() < 1))
textLine = MagicStrings.null_input;
if (textLine.equals("q")) {
System.exit(0);
} else if (textLine.equals("wq")) {
bot.writeQuit();
System.exit(0);
} else {
String request = textLine;
if (MagicBooleans.trace_mode)
System.out.println("STATE=" + request + ":THAT=" + ((History) chatSession.thatHistory.get(0)).get(0) + ":TOPIC=" + chatSession.predicates.get("topic"));
String response = chatSession.multisentenceRespond(request);
while (response.contains("&lt;"))
response = response.replace("&lt;", "<");
while (response.contains("&gt;"))
response = response.replace("&gt;", ">");
System.out.println("Robot : " + response);
}
}
} catch (Exception e) {
e.printStackTrace();
}

view raw

Chatbot.java

hosted with ❤ by GitHub

Now if we run this program, it will show us input to ask a question to chatbot Mr. Chatter.

Conclusion

In this article, we showed how to add a chatbot. Similarly, we can enhance this program by adding custom patterns that chatbot can respond to.

References

Chatbot Implementation

Chatbots and more

This is not the regular programming post, but more of a discussion post and where we are heading with our technology. Alexa, Google Home, Cortona and number of personal assistants are available at our perusal. With these kind of products, we are slowly evolving into artificial intelligence driven technology. Lot of manual labor jobs might be in danger in near future. Politics aside, I am more interested to understand this topic from technology and humane perspective. While we still struggle with lot of other ethical issues with existing technology, AI will only create social conundrums.

What I want to discuss in this post, is more about chatbots. You can think this as a scribbling post. I am just bringing some ideas forefront to build a chatbot using java.

What are chatbots?

Chatbots are crude version of personal assistants. Personal assistants help you in many ways, in process saving you time, providing you leisure. Simplest version of these chatbots are those that answer your questions like “What’s the weather like today?”, a chatbot will connect to a weather website to find out today’s weather and then answer you accordingly. Similarly, on a ecommerce site, I can ask a question by typing “Where can I find this book?”, chatbot will answer “In literature and short stories section”. A chatbot can also help build customer support, taking away the traditional customer support people. In more advance version, same chatbots can build a library based on your likings, dislikings, answers and provide more options for lifestyle.

Wikipedia definition says

A chatbot is a computer program that conducts a conversation via auditory or textual methods.

Chatbots are part of Artificial intelligence that has been popularized these days.

Design of chatbots

In this article, we will not be showing any code for chatbots, but we will be building chatbots in next post. This is a post where we bring the idea of chatbot into design. As we discussed the definition of chatbot, we will be building an agent that will chat with us in a natural language that we use for daily communication.

Me: “Hi Mr. Chatbot, how are you today?”

Mr. Chatbot: “I am fine, Mr. Mali. Thank You”

Me: “What’s the day today?”

Mr. Chatbot: “It’s Wednesday today.”

This is an example of conversation how a chatbot would answer. We will build a database which will have natural language processing ability to find out what question has been asked and based on that answer the question as accurately as possible. This chatbot is an experimental build up.

Does it mean it can falter? Glad you ask that, it definitely means it can answer erratic. But it’s ok in our experimentation world, even Google home had his off days.

We will need a chat engine and we will be using plain English to type our messages. We will use AIML (Artificial Intelligence Markup Language) to build this chatbot.

In conclusion, I would provide the implementation of this chatbot in next few posts. We will have more discussion about chatbots in future articles.


References

  1. AIML
  2. Chatbot

Design Pattern – Adapter Pattern – Part VII

Till now, we have discussed all creational type of design patterns. In this and next series of posts, we will be creating a demo about structural design patterns. In this series, our first design pattern is Adapter design pattern. As said, this design pattern is structural design pattern. This design pattern combines the capabilities of two independent interfaces. It basically acts like a bridge between two incompatible interfaces.

Easiest example to understand adapter pattern in real life is the electric socket in different continents provide different voltages. A traveler from Asia can use an adapter in Europe to get 240 V of electricity for electronic devices.

When to use Adapter Design Pattern?

When a client expects different interface than available, at that time adapter pattern can help to convert a interface of a class into another interface that client can use. Adapter pattern allows reuse of lot of code and it is one of the major reasons why it is most favorable among software engineering. A real example you would find in JDK libraries of InputStreamReader and OutputStreamWriter.

How to use Adapter Design Pattern?

So in this implementation, we will show how to use Adapter design pattern. We have a traveler from Asia traveling in Europe, he wants to use his electronic device which needs 240 V of electricity from socket, but Europe only provides 120 V of electricity. We will design an adapter class that will convert 120 V of electricity to 240 V of electricity.

Our target class or client class is AsiaSocket, as shown below:


package com.betterjavacode.designpatterns.adapterexample;
public class AsiaSocket {
public void provideElectricity() {
System.out.println("Provide electricity of 240 V");
}
}

view raw

AsiaSocket.java

hosted with ❤ by GitHub

https://gist.github.com/anonymous/24ac0ce1f21b3299e2c7e9a434af0f92.js

It’s a simple class with a method provideElectricity.

Our adaptee class is EuropeSocket which implements an interface IEuropeSocket as shown below:


package com.betterjavacode.designpatterns.adapterexample;
public class EuropeSocket implements IEuropeSocket {
public void getElectricity() {
System.out.println("Get electricity of 120 V");
}
}

https://gist.github.com/anonymous/b772f3dbcfc360d9affd919fd0edbf71.js

Now we will implement an Adapter class that will provide adapter between Europe and Asia Socket classes. This will look like below:


package com.betterjavacode.designpatterns.adapterexample;
public class EuropeAsiaAdapter implements IEuropeSocket {
AsiaSocket asiaSocket;
public EuropeAsiaAdapter(AsiaSocket asiaSocket) {
this.asiaSocket = asiaSocket;
}
public void getElectricity() {
asiaSocket.provideElectricity();
}
}

https://gist.github.com/anonymous/c4c9fb81966c8bf03bb35779a76e965c.js

This class has a constructor to instantiate AsiaSocket and implements IEuropeSocket interface.

Now in our demo class, we will show how to use this adapter pattern.


package com.betterjavacode.designpatterns;
import com.betterjavacode.designpatterns.adapterexample.AsiaSocket;
import com.betterjavacode.designpatterns.adapterexample.EuropeAsiaAdapter;
import com.betterjavacode.designpatterns.adapterexample.EuropeSocket;
import com.betterjavacode.designpatterns.adapterexample.IEuropeSocket;
public class AdapterDemo {
public static void main(String[] args) {
EuropeSocket es = new EuropeSocket();
AsiaSocket as = new AsiaSocket();
IEuropeSocket europeAsiaAdapter = new EuropeAsiaAdapter(as);
System.out.println(" Electricity in Asia ");
as.provideElectricity();
System.out.println(" Electricity in Europe ");
es.getElectricity();
System.out.println(" Electricity for Asia in Europe");
europeAsiaAdapter.getElectricity();
}
}

https://gist.github.com/anonymous/3b1fe4854e1b162e7525da98be600095.js

If you run this demo class, the output will show that we will be getting electricity of 240 V for asian electronic devices in europe.

Download

In this post, we showed how to use Adapter pattern. The demo code will be available on github repository here.

References

  1. Adapter Design Pattern
  2. Adapter Design Pattern in Java

Spring Boot and Microservices

Over the last few months, I have worked on Spring Boot and tried to collect my knowledge around Microservices. I was discussing lot of this with my friends and one friend did suggest me to write a book. Initially I was little hesitant to write a book about something I was learning. But also the whole point of learning is to teach someone at some point of time.

So I took this as a challenge to write a book about Spring Boot and Microservices. Initially I created series of posts and posted on this blog to see how much it could benefit people. And now to make it easy for every one, I have collected all this information and wrote an ebook. This ebook Spring Boot and Microservices is free to download. I hope this will help people to understand the concepts of Microservices and my example can help them to head start the building their projects.

Spring Boot and Microservices

What’s next?

Where do we go from here? There are lot of questions about the next strategy about Spring Boot and Microservices. What I have covered in this book, is a tiny portion of big picture. There is lot of options like scaling the service, adding health check for the service, deploying the service on cloud with automation. But for right now, I just want to take a break from thinking about this and I will come up with a next plan soon.

Till that time, you can download, read and send me your feedback about the book. It will be great if you can leave a review for the book here.

If you have any questions, please leave your comments on this blog and I will try my best to answer them.

How to deploy Spring Boot Application on docker – Part IX

What is docker

Docker is a container platform delivered by a company named “Docker Inc.” Docker can be used by developers, operators and enterprise users to deliver and use packaged software. Docker has something called a container. Container can be a virtual machine (VM) in lay man’s terms, but still little different from VM. Container contains packaged software delivered in a way that it can be run isolated on a shared operating system. As per official definition – Unlike VMs, container does not bundle a full operating system – only libraries and settings required to make the software work are needed.

In this demo, we will use our spring boot application built throughout from Part I to Part VIII.

I am using Windows Platform Toolbox for docker to build my docker containers. 

We will build a container with mysql database deployed and another container where we will deploy spring boot application. This spring boot application container will connect to mysql database container at runtime. The process is little complicated, but once you get your hands on docker container, it becomes very straight forward to understand. Also for this post, I will not explain anything about spring boot application. You should review all the previous posts I have written explaining how to build and deploy spring boot application on an embedded tomcat.

Building a docker container with mysql

Few things to remember

  1. Make sure your spring boot application is working with mysql database before you build a container.
  2. If your application contains user administration and password, make sure you have a super administrator whose password you can insert in database with password_hash. This is specifically true for the application we will be deploying in docker container.

For most standard applications (like mysql, java 8, spring-boot), there are number of images available in docker hub. When we will run our docker container for database, docker shell will pull the version of that application from the hub to build a container. We will not be creating any new or blank docker image. To run a docker container with mysql version 5.6, we will use below command.


docker run –name benefitsmysql -e MYSQL_ALLOW_EMPTY_PASSWORD=yes -e MYSQL_DATABASE=benefitsmysql -p 3308:3306 -d mysql:5.6


  • Name of our docker container is benefitsmysql.
  • We are not using any password. This is not recommended for production code, I am just doing this for demo purposes.
  • Database name is benefitsmysql.
  • Also this database is running at port 3308 to 3306 of local host machine.
  • -d to tell Docker to daemonize the container and keep it running.
  • mysql:5.6 to download MySQL 5.6 Server image from Docker public repo

Once this is started, there are couple of ways you can verify if we are able to connect to this database or not.

Get the ip address of this container host with command docker-machine ip . Now in mysql administrator workbench, access the mysql server with ip address and port 3308 and see if you can access the database.

Another way on docker shell terminal – use this command docker exec -it benefitsmysql -l , this will connect you as a root to the shell where mysql is installed. And then you can use mysql as regular command to access mysql.

To run our Spring boot application successfully, once you access mysql, create following tables:


use benefitsmysql;
create table companyprofile (id int not null auto_increment, establisheddate date, status varchar(50),corporationtype varchar(50), primary key(id));
create table company(id int not null auto_increment, name varchar(255), statusid int, type varchar(255), ein varchar(50), companyprofileid int, primary key(id), foreign key(companyprofileid) references company(id));
create table userprofile(id int not null auto_increment, dob date, doh date, maritalstatus varchar(50),sex varchar(50),ssn varchar(50),weight varchar(50), height varchar(50),employmentstatus varchar(50), terminationdate date, primary key(id));
create table user(id int not null auto_increment, createdate date, email varchar(255),firstname varchar(255), middlename varchar(255), lastname varchar(255),username varchar(100),jobtitle varchar(255),password_hash text,enabled tinyint(4), userprofileid int, primary key(id), foreign key(userprofileid) references userprofile(id));
create table role(id int not null auto_increment, role varchar(255), primary key(id));
create table user_role(user_id int not null, role_id int not null, primary key(user_id, role_id));

view raw

sqlscripts

hosted with ❤ by GitHub


Building a docker image for Spring Boot Application along with mysql

To dockerize my spring boot application, we will use a maven plugin to build a docker image.


<plugin>
<groupId>com.spotify</groupId>
<artifactId>docker-maven-plugin</artifactId>
<version>1.0.0</version>
<configuration>
<imageName>${docker.image.prefix}/benefits</imageName>
<dockerHost>https://192.168.99.100:2376</dockerHost&gt;
<dockerCertPath>C:\Users\Yogesh Mali\.docker\machine\machines\default</dockerCertPath>
<dockerDirectory>src/main/docker</dockerDirectory>
<resources>
<resource>
<targetPath>/</targetPath>
<directory>${project.build.directory}</directory>
<include>${project.build.finalName}.jar</include>
</resource>
</resources>
</configuration>
</plugin>

I am passing dockerDirectory where Dockerfile will be stored to build our image. Also another change I have made to my original pom file, is that i have added packaging as jar.


<groupId>com.betterjavacode</groupId>
<artifactId>Benefits</artifactId>
<packaging>jar</packaging>
<version>0.0.1-SNAPSHOT</version>
……………..
<plugin>
<groupId>org.springframework.boot</groupId>
<artifactId>spring-boot-maven-plugin</artifactId>
<configuration>
<mainClass>com.betterjavacode.benefits.Application</mainClass>
</configuration>
<executions>
<execution>
<goals>
<goal>repackage</goal>
</goals>
</execution>
</executions>
</plugin>

I have also changed in my application.properties to point to mysql database container by updating database url with ipaddress of docker container.

spring.datasource.url=jdbc:mysql://192.168.99.100:3308/benefitsmysql

My Dockerfile to build a docker image is as below:


FROM java:8
VOLUME /tmp
ADD Benefits.jar Benefits.jar
EXPOSE 8443
RUN bash -c 'touch /Benefits.jar'
ENTRYPOINT ["java","-Djava.security.egd=file:/dev/./urandom","-jar","/Benefits.jar"]

view raw

Dockerfile

hosted with ❤ by GitHub

Basically this will build a Benefits.jar using java 8 and will expose port 8443 that I can use to access my application.

Now build a new docker container image by using maven goal as

mvn clean package docker:build

To run the application

docker run -p 8443:8443 --name benefits --link benefitsmysql:mysql -d containerid

This will execute the jar built within that container. Important to note here is --link as it links other container where we have mysql server deployed. So we are linking two containers and we will call the database from our spring boot application container. The same command can be used little differently to see the detail execution log as below

docker run -p 8443:8443 --name benefits --link benefitsmysql:mysql -it containerid


Executing the application

Once the application starts successfully, we will access our application with url https://192.168.99.100:8443/home , this will look like below:

DockerContainerSpringAppLogin

Another note – Make sure to update ip addess in all angular js references.

In this post, we showed how we can deploy Spring boot application connected to mysql on a docker container. Code for this post will be available on github repository here

References

To write my post, I used following references

  1. Docker
  2. Connection refused error
  3. Spring Boot docker

How to use Spring Boot Security in web application – Part VIII

In this post, we will show how to use Spring Boot Security to login, authorization based on user role, logout and error handling.

We will be discussing following use case

  1. A user access a home page for application.
  2. If user is authenticated, he will be redirected to page
  3. If user is not authenticated, he will be challenged to login ( redirected to login page)
  4. User enters credentials
  5. If correct credentials, a session is created and user is verified for role
  6. If incorrect credentials, show an error message
  7. If user is of role USER, he is redirected to user profile page. He can only edit or save his information.
  8. If user is of role ADMIN, he is redirected to list of users page.
  9. If user clicks on logout, session is deleted and user is redirected to login page.
  10. If user (of any role) tries to login after logout, user should be redirected to appropriate page
  11. If user is neither USER nor ADMIN, he is redirected to error page
  12. Handling of CSRF token

To completely understand this post, make sure you have gone through my other posts on Spring Boot series.

  1. Spring Boot REST CRUD API
  2. Swagger Documentation
  3. User Interface using AngularJS


Database changes

Since this post involves authorization for users, we have to do some database changes. We will add couple of tables and respective model classes in our REST api modification.

  • Table role
  • Table user_role

create table role (id int(11) auto_increment primary key not null, role varchar(255) )


create table user_role (user_id int(11) primary key not null, role_id int(11) primary key not null))

user_role table helps to maintain many-to-many relationship between user and role table. We will have only two roles for demo purposes USER and ADMIN.

Another change we have done in table user is that we have added field called password_hash to store password set by user/administrator for user to login. We will be storing a hash password value of the original password that user will set.

Dependencies

Since we will be using Spring-security for authentication and authorization purposes, we will add the dependency for spring security as follows:


<dependency>    <groupId>org.springframework.boot</groupId>    <artifactId>spring-boot-starter-security</artifactId> </dependency> 

Controllers and Web Layer

Other than those changes mentioned about, we will demonstrate this post in top-down fashion rather than bottom-up fashion.

So for web layer, we will define a new controller LoginController and modify our existing MainController.


package com.betterjavacode.benefits.controller;

import org.apache.logging.log4j.LogManager;
import org.apache.logging.log4j.Logger;
import org.springframework.beans.factory.annotation.Autowired;
import org.springframework.security.core.Authentication;
import org.springframework.security.core.context.SecurityContextHolder;
import org.springframework.stereotype.Controller;
import org.springframework.ui.Model;
import org.springframework.web.bind.annotation.RequestMapping;
import org.springframework.web.bind.annotation.RequestMethod;

import com.betterjavacode.benefits.entities.User;
import com.betterjavacode.benefits.interfaces.UserManager;

/**
*
* @author Yogesh Mali
*
*/
@Controller
public class LoginController {

public static final Logger LOGGER = LogManager.getLogger(LoginController.class);

@Autowired
UserManager userManager;

/**
*
* @param model
* @return
*/
@RequestMapping(value = "/user", method = RequestMethod.GET)
public String userpage(Model model) {
LOGGER.info(" Enter >> userpage() ");
Authentication auth = SecurityContextHolder.getContext()
.getAuthentication();
String name = auth.getName();
User user = userManager.findUserByEmail(name);
model.addAttribute("name", user.getFirstname());
model.addAttribute("userid", user.getId());
LOGGER.info(" Exit << userpage() ");
return "user";
}

/**
*
* @return
*/
@RequestMapping(value = { "/login" })
public String login() {
return "login";
}

/**
*
* @return
*/
@RequestMapping(value = "/403", method = RequestMethod.GET)
public String Error403() {
return "403";
}
}

As shown in this controller, we have defined a user page, a login page and an error page (403). A user with role of either USER or ADMIN or both can access a user page which shows that logged in user’s profile.

Every user irrespective of roles, will be redirected to login page for authentication. If there are any errors during authentication or authorization, user will be redirected to access denied page (403).

Source code for login page is as below:


<!DOCTYPE html><!DOCTYPE html><html xmlns="http://www.w3.org/1999/xhtml" xmlns:th="http://www.thymeleaf.org">
<head> <title>Benefits Application</title>
	<link rel="stylesheet" href="https://maxcdn.bootstrapcdn.com/bootstrap/3.3.7/css/bootstrap.min.css" /> 	<link rel="stylesheet" type="text/css" th:href="@{/css/login.css}" />  <script src="https://ajax.googleapis.com/ajax/libs/jquery/3.1.1/jquery.min.js"></script>  <script src="https://maxcdn.bootstrapcdn.com/bootstrap/3.3.7/js/bootstrap.min.js"></script></head>
<body>
<div class="container"> <form th:action="@{/login}" method="POST" class="form-signin">
<h3 class="form-signin-heading" th:text="Welcome"></h3>
<input type="text" id="email" name="username"  th:placeholder="Email" class="form-control" style="width:350px"/>
<input type="password"  th:placeholder="Password" id="password" name="password" class="form-control" style="width:350px"/>
<div align="center" th:if="${param.error}">
<p style="font-size: 20; color: #FF1C19;">Email or Password invalid, please verify</p>

</div>
<button class="btn btn-lg btn-primary btn-block" name="Submit" value="Login" type="Submit" th:text="Login" style="width:350px"></button> </form></div>
</body></html>

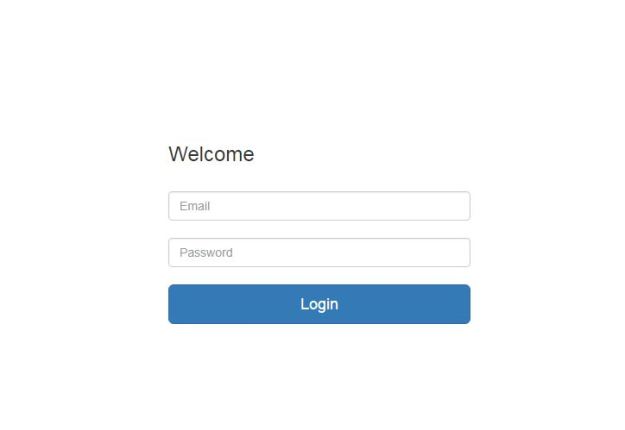
This login page shows a simple form to input username (email) and password and process that authentication using spring-security database authentication method.


@RequestMapping(value = "/home", method = RequestMethod.GET)
public String homepage(Model model) {
LOGGER.info(" Enter &gt;&gt; homepage() ");
Authentication auth = SecurityContextHolder.getContext()
.getAuthentication();
String name = auth.getName();
User user = userManager.findUserByEmail(name);
model.addAttribute("name", user.getFirstname());
LOGGER.info(" Exit &lt;&lt; homepage() ");
return "index";
}

Changes in MainController are about authenticated user and passing that user’s first name to model to display in html page. UserManager in service layer has been enhanced to return an user based on username (which is email) . We have also added email to be unique as a constraint in database.

User page for an user with role USER is nothing but a user profile information which he can edit and update any time.


<html ng-app="benefitApp"><html ng-app="benefitApp"><head><meta http-equiv="Content-Type" content="text/html; charset=ISO-8859-1" />
<title>Benefit Application</title><script>document.write('<base href="' + document.location + '" />');</script>	<link rel="stylesheet" href="/css/bootstrap.css" /><script src="https://code.angularjs.org/1.6.1/angular.js"></script><script src="https://cdnjs.cloudflare.com/ajax/libs/angular.js/1.6.1/angular-route.js"></script><script src="https://cdnjs.cloudflare.com/ajax/libs/angular.js/1.6.1/angular-resource.js"></script><script type="text/javascript" src="./js/app.js"></script></head><body ng-controller="UserCtrl">Hello
<p th:text="${name}"></p>

<div>
<ul class="menu">
	<li><a th:href="@{'userProfile/' + ${userid}}">Profile</a></li>
</ul>
<div ng-view="ng-view"></div>
</div>
<div class="input-group">
<div class="controls">    <a ng-click="logout()" class="btn btn-small">Logout</a></div>
</div>
</body></html>

Authentication

Now we have the application ready with all the required backend details for adding authentication part. Remember we are using spring-security for authentication and authorization of an application.


package com.betterjavacode.benefits;

import javax.sql.DataSource;

import org.apache.logging.log4j.LogManager;
import org.apache.logging.log4j.Logger;
import org.springframework.beans.factory.annotation.Autowired;
import org.springframework.beans.factory.annotation.Value;
import org.springframework.boot.autoconfigure.security.SecurityProperties;
import org.springframework.context.annotation.ComponentScan;
import org.springframework.context.annotation.Configuration;
import org.springframework.core.annotation.Order;
import org.springframework.security.config.annotation.authentication.builders.AuthenticationManagerBuilder;
import org.springframework.security.config.annotation.web.builders.HttpSecurity;
import org.springframework.security.config.annotation.web.builders.WebSecurity;
import org.springframework.security.config.annotation.web.configuration.EnableWebSecurity;
import org.springframework.security.config.annotation.web.configuration.WebSecurityConfigurerAdapter;
import org.springframework.security.crypto.bcrypt.BCryptPasswordEncoder;

@Configuration
@ComponentScan("com.betterjavacode.benefits.services")
@EnableWebSecurity
@Order(SecurityProperties.ACCESS_OVERRIDE_ORDER)
public class SecurityConfig extends WebSecurityConfigurerAdapter {

    public static final Logger LOGGER = LogManager.getLogger(SecurityConfig.class);

    @Autowired
    private SimpleAuthenticationSuccessHandler loginSuccess;

    @Autowired
    private LogoutSuccess logoutSuccess;

    @Autowired
    private BCryptPasswordEncoder bCryptPasswordEncoder;

    @Autowired
    private DataSource dataSource;

    @Value("${spring.queries.users-query}")
    private String usersQuery;

    @Value("${spring.queries.roles-query}")
    private String rolesQuery;

    @Autowired
    protected void configureGlobal(AuthenticationManagerBuilder auth) throws &amp;nbsp; &amp;nbsp; &amp;nbsp; &amp;nbsp;Exception {
       LOGGER.info(" Enter &gt;&gt; configureGlobal() ");
       auth.jdbcAuthentication()
       .usersByUsernameQuery("select email,password_hash,enabled from user where email=?")
       .authoritiesByUsernameQuery("select u.email,r.role from user u inner join user_role ur on(u.id=ur.user_id) inner join role r on(r.id=ur.role_id) where u.email=?")
       .dataSource(dataSource)
       .passwordEncoder(bCryptPasswordEncoder);
       LOGGER.info(" Exit &lt;&lt; configureGlobal() ");
    }

   /**
   * Handle Login - Authentication and Redirection
   */
   @Override
   protected void configure(HttpSecurity http) throws Exception {
            http.csrf()
                .disable()
                .authorizeRequests()
                .antMatchers("/home")
                .hasAuthority("ADMIN")
                .antMatchers("/user")
                .hasAnyAuthority("USER", "ADMIN")
                .and()
                .formLogin()
                .loginPage("/login")
                .successHandler(loginSuccess)
                .permitAll()
                .and()
                .logout()
                .logoutSuccessHandler(logoutSuccess)
                .deleteCookies("JSESSIONID")
                .invalidateHttpSession(false)
                .permitAll()
                .and()
                .exceptionHandling()
                .accessDeniedPage("/403");

    }

    /**
     * Exclude resources from user-access
     */
     @Override
     public void configure(WebSecurity web) throws Exception {
        web.ignoring()
        .antMatchers("/resources/**", "/static/**", "/css/**", "/js/**", "/images/**");
     }
}

What’s happening in this code?

  • When a user with role ADMIN or USER calls either /home or /user pages respectively, the user will be challenged to login.
  • Once the user inputs credentials, they are validated against JDBC database authentication mechanism provided by spring-security.
  • If user of role USER tries to access ADMIN home page, user will be redirected to 403 page. Redirection strategy is handled by an authentication success handler.
  • If user clicks LOGOUT button on the page he is on, he will be logged out of application and redirected back to login page. All the cookies will be deleted. Redirection will be handled by logout success handler.


Changes in AngularJS User Interface Controller

As shown in user.html page, once the user with role USER is logged in, he sees url for his profile information. If user clicks this url, user sees his or her profile information. This page has a controller called UserCtrl which basically handles the logout on this initial page. User Profile is shown on userprofile.html page which has singleusercontroller. This angular js controller handles updating user profile information or logout. Rest of the code will be updated in github repository for self-explanation.

Handling CSRF Token

There are two ways Cross-Site Request Forgery token can be handled in Spring application. First way is by disabling this token generation. This is not a recommended approach as this put your application to possible CSRF security attacks for hackers. If you are just doing this for demo purposes, you can disable this in SecurityConfig.java by calling http.csrf().disable().

As spring points out, CSRF Protection should be used for any request that could be processed by a browser by normal users.

We will be using spring security to handle CSRF token on server side rather than on client side.  So every request that will come to server will be intercepted to add a CSRF token and then verified. Angular JS verifies the cookie for CSRF token before a user can post any request.

Add a CSRF Filter Class

We will add a filter that will handle setting of CSRF token in a cookie. Angular JS expects a cookie name to be as XSRF-TOKEN. This class will look like below:


public class CSRFHeaderFilter extends OncePerRequestFilter {

  @Override
  protected void doFilterInternal(HttpServletRequest request, HttpServletResponse response, FilterChain filterChain) throws ServletException, IOException {
      CsrfToken csrf = (CsrfToken) request.getAttribute(CsrfToken.class.getName());
      if (csrf != null) {
      Cookie cookie = WebUtils.getCookie(request, "XSRF-TOKEN");
      String token = csrf.getToken();
      if (cookie == null || token != null && !token.equals(cookie.getValue())) {
        cookie = new Cookie("XSRF-TOKEN", token);
        cookie.setPath("/");
        response.addCookie(cookie);
      }
      }
     filterChain.doFilter(request, response);

   }

}

Now we will enable csrf token in SecurityConfig as shown below


.and()
.csrf()
.csrfTokenRepository(csrfTokenRepository())
.and()
.addFilterAfter(new CSRFHeaderFilter(), CsrfFilter.class);

What is csrfTokenRepository?

We tell spring-security to expect CSRF token in the format that Angular wants to send it back , a header called X-XSRF-TOKEN instead of default X-CSRF-TOKEN. With these changes, we don’t have to do anything on client side.


private CsrfTokenRepository csrfTokenRepository() {
HttpSessionCsrfTokenRepository repository = new HttpSessionCsrfTokenRepository();
repository.setHeaderName("X-XSRF-TOKEN");
return repository;
}

Demo

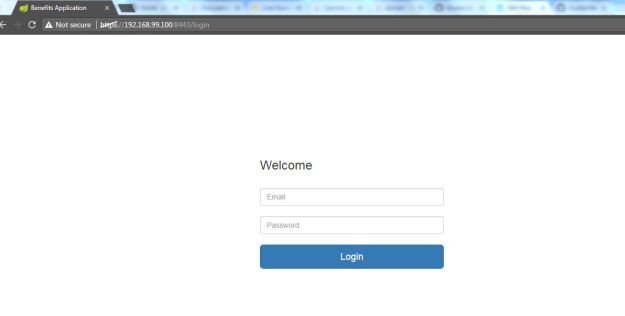
In this post, we showed how to use spring security for authentication and authorization. Now we will show how to run the application. Once the application is built and run from eclipse, access the page https://localhost:8443/home , we will see below screen:

LoginScreen
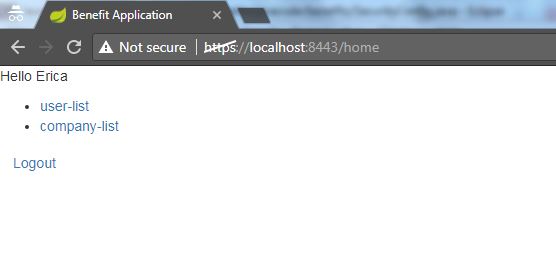
It will be the same screen if you access https://localhost:8443/user. Now if we enter credentials of an admin user, we will see below screen:

AdminScreen.JPG

User screen will be as below:

UserScreen


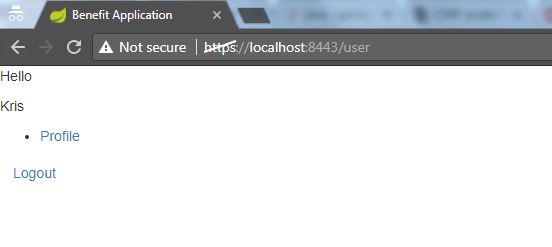
If you click logout, it will log the user out and show login screen again. In this way, we showed how we can use spring security for authentication and authorization. Code for this is available at Github repository.


References

Following articles were referred while preparing this demo:

  1. Spring Boot Security
  2. Login Page Angular JS and Spring Security

Microservices – A Primer

What is Microservices?

Wikipedia definition says

Microservices is a variant of the service-oriented architecture (SOA) architectural style that structures an application as a collection of loosely coupled services.

But there is no official definition of Microservices by industry standards. It’s recent phenomenon in software industry to architect the new softwares which should be light weight, easier to deploy and scale, easier to refactor individually and could work independently.

To understand in details, you can definitely read Martin Fowler’s Microservices or Chris Richardson’s Microservices.

We will not be covering this post in detail as compared to link I have posted here. Microservices are small services that can run independently, but can also easily communicate with other services.

Microservice Architecture vs Monolithic Architecture

In traditional monolithic architecture style, there is a single application with single code base. An application contains number of modules which are interrelated and can have external dependencies. It’s a multi-tier enterprise application and has been used to build software for long.

Microservice architecture style was born out of need to build an application that could easily be supported for mobile applications. Older style was not easy to support for mobile and new generation way to handling of data. Any large enterprise application can be easily built using microservices architecture style.

How to identify Microservice Architecture Pattern?

A simple ground rule of microservice architecture pattern is to build a standalone service that can be run without depending on any other service. That means for a large application can have more than one services talking to each other, communicating with their own databases, but still performing the business logic. Databases are used to ensure loose coupling of services.

A large enterprise e-commerce application can consist of following services

  1. Backend service REST API to manage data
    1. Account Service
    2. Shipment Service
    3. Inventory Service
  2. Runtime service to handle runtime and backend data to process business logic
  3. Logging service
  4. Error Handling service
  5. Session service

UI for the e-commerce application can be built independently to use backend services to show/edit data.

By standards, there are few rules to identify microservices patterns

  1. Decomposition by business capability
  2. Database per service pattern
  3. API gateway pattern
  4. Client-side discovery and Server-side discovery

Pros and Cons of Microservices

Pros

  1. Deployability – They can independently be deployed.
  2. Reliability – A fault in the service can only bring down that service, depending on handling in application, rest of the application can still be accessed.
  3. Scalability – Each microservice can be scaled depending on requirements using clusters and grids.
  4. Availability – Dispatching the patch or newer version of service requires less downtime compared to regular monolithic application.
  5. Management – Easier to manage
  6. Design and Development – Each service can be developed independently and helps developer to manage the service easily without worrying about other services.

Cons

  1. Performance – All services involved in application have to communicate with each other over network and that could hamper the performance.
  2. Testability – Automated tests are harder to manage and run.
  3. Memory usage – Possible duplicate data across services and lot of duplication in cache.

References

You can read more about Microservices at following links:

  1. Microservices by Chris Richardson
  2. Microservices by Martin Fowler
  3. Stackoverflow post about microservices

Design Pattern – Prototype Pattern – Part VI

If you want to read about previous posts related to design patterns, series of posts about design patterns are

  1. Introduction to design patterns
  2. Singleton Pattern
  3. Factory Pattern
  4. Abstract Factory Pattern
  5. Builder Pattern

The next post about Prototype design pattern will cover creation design pattern that we have been writing about till now.

When to use Prototype Design Pattern?

Since this is a creational design pattern, this is used when decision is to reduce creation cost of object through standard way. There can be argument about how this is then different from abstract factory pattern. The key benefit of Prototype design pattern is that it optimizes the use case where multiple objects of same type will have mostly same data.

Major example is reading configuration data from a file/database over a network. Also if you want to hide the logic of creating new instance from the client.

How to use Prototype Design Pattern?

In this pattern, there is an interface of Prototype that has method for clone and any concrete class implementing this interface, implements the method to clone the object.


public interface Car {

Car clone();

}

We have an interface Car which we will implement in our concrete classes.


package com.bettterjavacode.designpatterns.prototypeexample;

public class Toyota implements Car {

private final String CARNAME = "Toyota";

public Car clone() {
return new Toyota();
}

@Override
public String toString() {
return CARNAME;
}

}

We will have a factory class that will get us a prototype based on type of object we have passed. This will look like below:


package com.bettterjavacode.designpatterns.prototypeexample;

import java.util.HashMap;
import java.util.Map;

public class CarFactory {

private static final Map<String, Car> prototypes = new HashMap<String, Car>();

static {
prototypes.put("toyota", new Toyota());
prototypes.put("lexus", new Lexus());
prototypes.put("bmw", new BMW());
}

public static Car getPrototype(String type) {
return prototypes.get(type)
.clone();
}
}

Now our demo class will pass the type of car as an argument to print the carname. That will look like below:


package com.betterjavacode.designpatterns;

import com.bettterjavacode.designpatterns.prototypeexample.Car;
import com.bettterjavacode.designpatterns.prototypeexample.CarFactory;

public class PrototypeDemo {

public static void main(String[] args) {
if (args.length > 0) {
for (String type : args) {
Car prototype = CarFactory.getPrototype(type);
if (prototype != null) {
System.out.println(prototype);
}
}
} else {
System.out.println(" Run again with arguments");
}

}

}

Conclusion

In this post, we showed how to use prototype design pattern. The code for this is available here

References

  1. Design Patterns – Prototype
  2. Prototype Pattern

Design Patterns – Builder Pattern – Part V

Continuing the series of posts about design patterns, we will talk about builder pattern in this post. Builder pattern is of type creational design pattern. One of the major uses of Builder pattern is when there are too many constructor parameters to handle.

When to use Builder Pattern?

Builder pattern enforces a step by step approach to create a complex object. The object can not be used till it’s a finished product. It helps to encapsulate complex creation logic. One of the examples from real time is file creation with a format. If you are create a file about certain format (example xml, csv), you can builder pattern to create simple logical approach to creating file.

How to use Builder Pattern?

Lately working on a project to build an EDI file to transfer between customer, I have to create a file of format 834. So 834 file format varies according to different health insurance carrier. This file format contains headers, records and trailers. Headers indicate different paradigm about the file and the customer and who is sending it. To show example of builder pattern, I will use one of the headers of this file format and how it can be created using builder pattern.

One of the headers is called Transactional Group Header. This header looks like below in a real file

ST*834*5432853*005010X220A1~

First field “ST” indicates that it is a transactional group. All the records for one customer can lie between ST and SE. 834 is a transaction code for file format. Since this is 834 file format, code is 834. 5432853 is a unique transaction control number, this can be anything between 4 digits in length to maximum 9 digits in length. 005010X220A1 is a implementation reference number.

Our implementation of the class with have fields for each of these field from header, a private constructor and a static builder class. This is shown below:


public class TransactionalHeader implements Serializable {
private static final long serialVersionUID = 7517644545656169045L;

private String st;

private String transactioncode;

private String transactioncontrolnumber;

private String implementationreference;

public static class Builder {

private String st;

private String transactioncode;

private String transactioncontrolnumber;

private String implementationreference;

public Builder st(String st) {

this.st = st; return this;

}

public Builder transactioncode(String transactioncode) {

this.transactioncode = transactioncode; return this;

}

public Builder transactioncontrolnumber(String transactioncontrolnumber) {                            this.transactioncontrolnumber = transactioncontrolnumber; return this;

}

public Builder implementationreference(String implementationreference) {                                this.implementationreference = implementationreference; return this;

}

public TransactionalHeader build() {

return new TransactionalHeader(this);

}

}

private TransactionalHeader(Builder builder) {

this.st = builder.st;

this.transactioncode = builder.transactioncode;

this.transactioncontrolnumber = builder.transactioncontrolnumber;

this.implementationreference = builder.implementationreference;

}

public String toString() {

String result = "";

StringBuffer sb = new StringBuffer();

sb.append(st);

sb.append(FileUtil.FIELD_SPLITTER);

sb.append(transactioncode);

sb.append(FileUtil.FIELD_SPLITTER);

sb.append(transactioncontrolnumber);

sb.append(FileUtil.FIELD_SPLITTER);

sb.append(implementationreference);

sb.append("~");

result = sb.toString();

return result;

}

}

This was our builder class. Let’s create a demo class that will use this builder class to build an object that will give us transactional header in file. This will look like below:


public String getTransactionalHeader() {

String result = "";

TransactionalHeader th = new TransactionalHeader.Builder()

.st("ST")

.transactioncode(TRANSACTION_IDENTIFIER_CODE)

.transactioncontrolnumber(FileUtil.getTransactionControlNumber())

.implementationreference("005010X220A1").build();

result = th.toString();

return result;

}

In this way, builder design pattern can be used to construct complex objects. One of the easy way to identify when to use this design pattern is when you have more than 4 or more parameters in your constructor.

Code for this post is available to download here.